When potential customers search for your business or services nearby, your Google Business Profile can be one of the first things they see. It puts essential information such as your location, hours, phone number, photos, services, and customer reviews directly into Google Search and Maps.
The good news is that creating a profile is free. Google allows eligible storefront and service-area businesses to create and manage their presence on Search and Maps without paying a listing fee.
If you are wondering how to create a Google Business Profile, this guide walks you through the process from checking your eligibility to completing your profile after verification.
What Is a Google Business Profile?
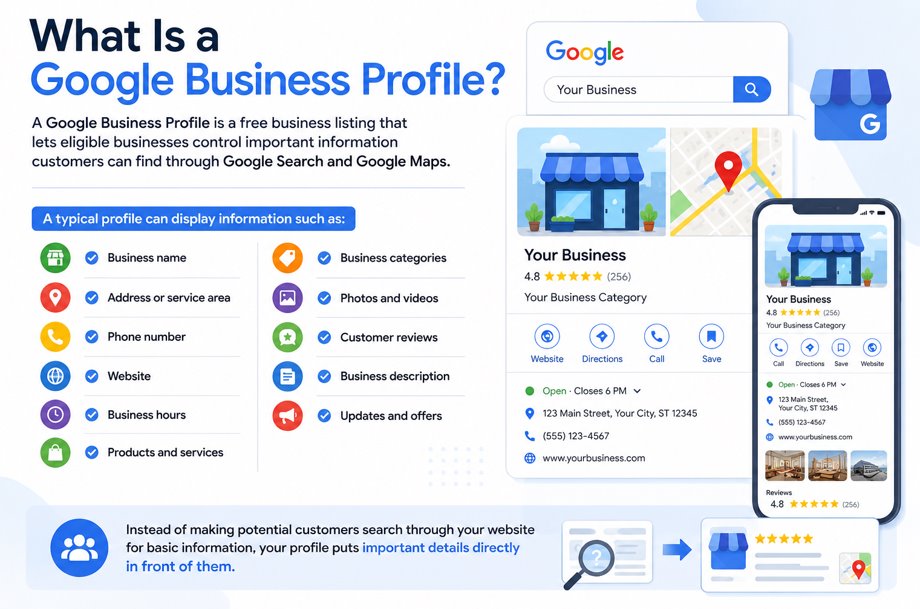
A Google Business Profile is a free business listing that lets eligible businesses control important information customers can find through Google Search and Google Maps.
A typical profile can display information such as:
- Business name
- Address or service area
- Phone number
- Website
- Business hours
- Products and services
- Business categories
- Photos and videos
- Customer reviews
- Business description
- Updates and offers
Instead of making potential customers search through your website for basic information, your profile puts important details directly in front of them.
What Is a Google Business Profile?
Before Creating Your Google Business Profile
Before starting the setup process, check two important things: whether your business is eligible and whether a profile already exists.
Google generally requires eligible businesses to make in-person contact with customers during their stated business hours. This includes businesses customers visit and businesses that travel to customers. Online-only businesses generally aren’t eligible.
Next, search your exact business name and location on Google Search and Google Maps.
If a profile already exists, do not create another one. Claim the existing listing instead. If another person has already verified it, Google provides an ownership-request process.
Once you have checked these points, you are ready to begin.
How to Create a Google Business Profile in 9 Steps

Step 1: Sign In to Your Google Account
Start by signing in to the Google Account you want to use for managing the business.
Whenever possible, use an account that your company will control long-term rather than an employee’s personal account. This can make access easier to manage when employees or marketing providers change.
You don’t necessarily need a Gmail address. Google allows you to create or use a Google Account with another email address.
Step 2: Add Your Business to Google
Visit Google’s Business Profile setup page and select the option to add your business.
Enter your business information as Google requests it. If Google recognizes an existing listing with a similar name, review it carefully before proceeding.
Finding your actual business here may mean you need to claim the existing profile instead of creating a new one.
Step 3: Enter Your Real Business Name
Enter the business name customers actually see in the real world.
For example, if your storefront, website, and branding use “Smith Family Dental,” that should generally be the name used on the profile.
Avoid adding promotional keywords simply to improve rankings.
Don’t turn:
Smith Family Dental
into:
Smith Family Dental – Best Dentist & Emergency Dental Clinic
unless that wording is genuinely part of the business’s established real-world name.
Using accurate information from the beginning reduces the risk of creating inconsistencies or running into Google Business Profile policy issues.
Step 4: Choose Your Primary Business Category
Your category tells Google what type of business you operate.
Be as specific as the available options allow. A specialist business should generally choose the category that most accurately describes its primary activity rather than selecting an unnecessarily broad category.
For example, a dedicated Italian restaurant should select the closest specific category available instead of choosing a loosely related business type.
Ask yourself:
“What is this business?”
rather than:
“What products or services does this business offer?”
You can add relevant additional categories later.
Step 5: Add Your Location or Service Area
How you configure your location depends on how the business serves customers.
| Business Type | Appropriate Setup |
|---|---|
| Customers visit your location | Add your eligible physical business address |
| You travel to customers | Configure your service area |
| Both apply | Configure the profile according to your storefront and service-area operations |

For example, a retail store normally needs its customer-facing location. A mobile cleaning company may operate as a service-area business instead.
Enter this information accurately. Your address and service-area settings affect how customers understand where and how you operate.
Step 6: Add Your Contact Information
Next, add the contact information customers should use to reach your business.
Depending on the options available for your profile, this can include your:
- Business phone number
- Website URL
- Business hours
- Other relevant business details
Keep these details consistent with the information published on your website and other important business listings.
If your phone number, hours, or location changes later, update your Business Profile rather than leaving outdated information visible to customers.
Step 7: Verify Your Business
Creating the listing is only part of the process. Google may require you to verify that you are authorized to represent the business.
Available verification methods can vary by business. Follow the verification options Google presents for your particular profile rather than assuming a specific method will be available.
Depending on your situation, Google may provide methods involving video, phone or text, email, or other verification processes.
Provide genuine, accurate information during verification. Avoid making unnecessary changes to important profile information while working through the process.
Step 8: Complete Your Business Profile
After setup and verification, don’t leave the profile half-finished.
Complete the relevant sections available for your business, including:
- Regular and special business hours
- Business description
- Services or products
- Logo and cover image
- Exterior and interior photos
- Relevant business attributes
- Website and contact details
- Opening date, where appropriate
Google also allows businesses to add photos and videos and interact with customers through reviews and other profile features.
Step 9: Review Your Profile as a Customer
Finally, search for your business through Google Search and Maps and examine the listing from a customer’s perspective.
Ask:
- Is the business name correct?
- Is the map location accurate?
- Are the hours current?
- Does the phone number work?
- Does the website link open correctly?
- Are the right services shown?
- Do the photos accurately represent the business?
This simple review often catches errors that are easy to overlook while setting up the profile.
Common Google Business Profile Setup Mistakes
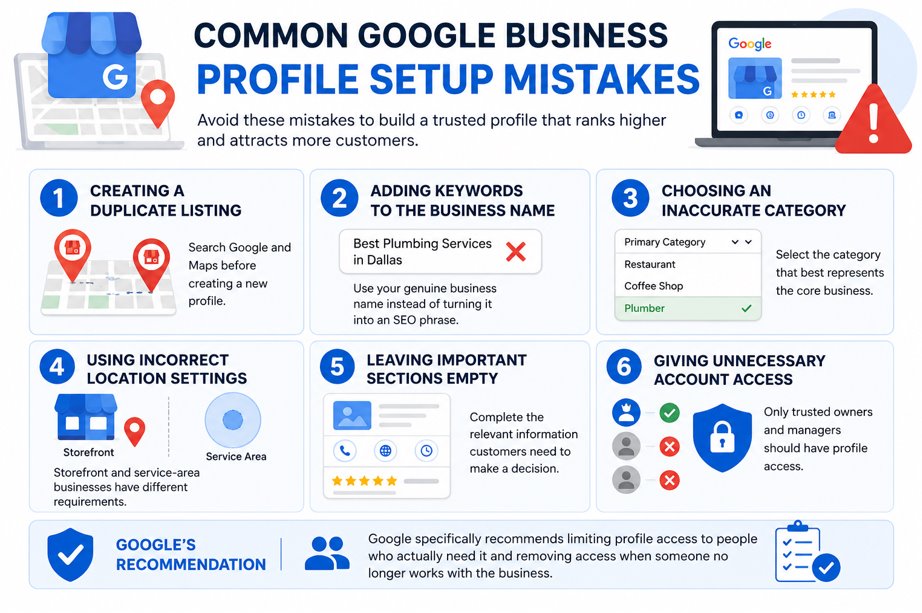
A technically completed profile isn’t necessarily a well-created profile. Avoid these common problems:
- Creating a duplicate listing: Search Google and Maps before creating a new profile.
- Adding keywords to the business name: Use your genuine business name instead of turning it into an SEO phrase.
- Choosing an inaccurate category: Select the category that best represents the core business.
- Using incorrect location settings: Storefront and service-area businesses have different requirements.
- Leaving important sections empty: Complete the relevant information customers need to make a decision.
- Giving unnecessary account access: Only trusted owners and managers should have profile access.
Google specifically recommends limiting profile access to people who actually need it and removing access when someone no longer works with the business.
What Should You Do After Creating Your Profile?
Creating the profile is the foundation, not the end of your local SEO work.
Keep your information accurate, upload useful photos, add relevant products or services, respond professionally to customer reviews, and update special hours when holidays or operating schedules change.
You should also periodically check how the business appears in Search and Maps. Google can receive business information from several sources, so monitoring the profile helps you catch unwanted or inaccurate changes.
Frequently Asked Questions
Is it free to create a Google Business Profile?
Yes. Google allows eligible businesses to add or claim a Business Profile at no charge. Businesses can then manage how key information appears across Google Search and Maps.
Can I create a Google Business Profile without a physical store?
Yes, if you operate an eligible service-area business that meets Google’s requirements. Businesses that travel to customers may be able to configure a service area instead of displaying a customer-facing storefront.
Do I need a Gmail account to create a Google Business Profile?
You need a Google Account, but it does not necessarily have to use a Gmail address. Google allows users to create a Google Account with an existing email address.
What if my business is already listed on Google?
Don’t immediately create another profile. If the existing profile is unverified, you may be able to claim it. If another person already manages a verified profile, you can follow Google’s process to request ownership.
How long does Google Business Profile verification take?
There is no single verification timeline that applies to every business. The available verification method and review process can vary, so follow the instructions Google provides for your specific profile.
Create Your Google Business Profile the Right Way
Learning how to create a Google Business Profile is straightforward, but small setup decisions matter. Start by checking whether your business already exists, use accurate real-world information, choose the right category and location settings, complete verification, and then fill out the profile thoroughly.
Once your profile is live, treat it as an active customer-facing asset rather than a one-time listing. Keep your hours, services, contact information, photos, and other details current so customers can confidently choose and contact your business.
Ready to improve your local visibility? Create or claim your Google Business Profile, complete every relevant section, and make profile management part of your ongoing local SEO strategy.